Drilax Diamond Drill Bit Hole Saw Guide Jig
Hole Saw Guide Jig Fixture Vacuum Suction Base with Water Coolant Hole for Tiles, Glass, Fish Tanks, Marble, Granite, Ceramic, Porcelain Guides Holes up to 3 1/4 Inches
Quick Tip 1: Using diamond hole saws, it does not matter which way you run your drill. If you are concerned with the nuts unscrewing, we suggest you run drill in reverse (counter-clockwise). This will prevent hole saw guide bearing nuts from unscrewing.
Quick Tip 2: You do not need the guide for the entire duration of the drilling. Once you have made a mark on the material, the hole saw will keep in position.
Quick Tip 3: Do not forget to use water. It is OK to stop drilling for a cleanup and cooling.
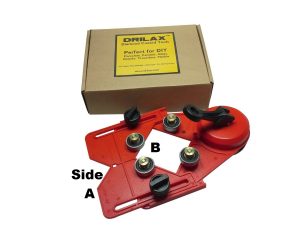
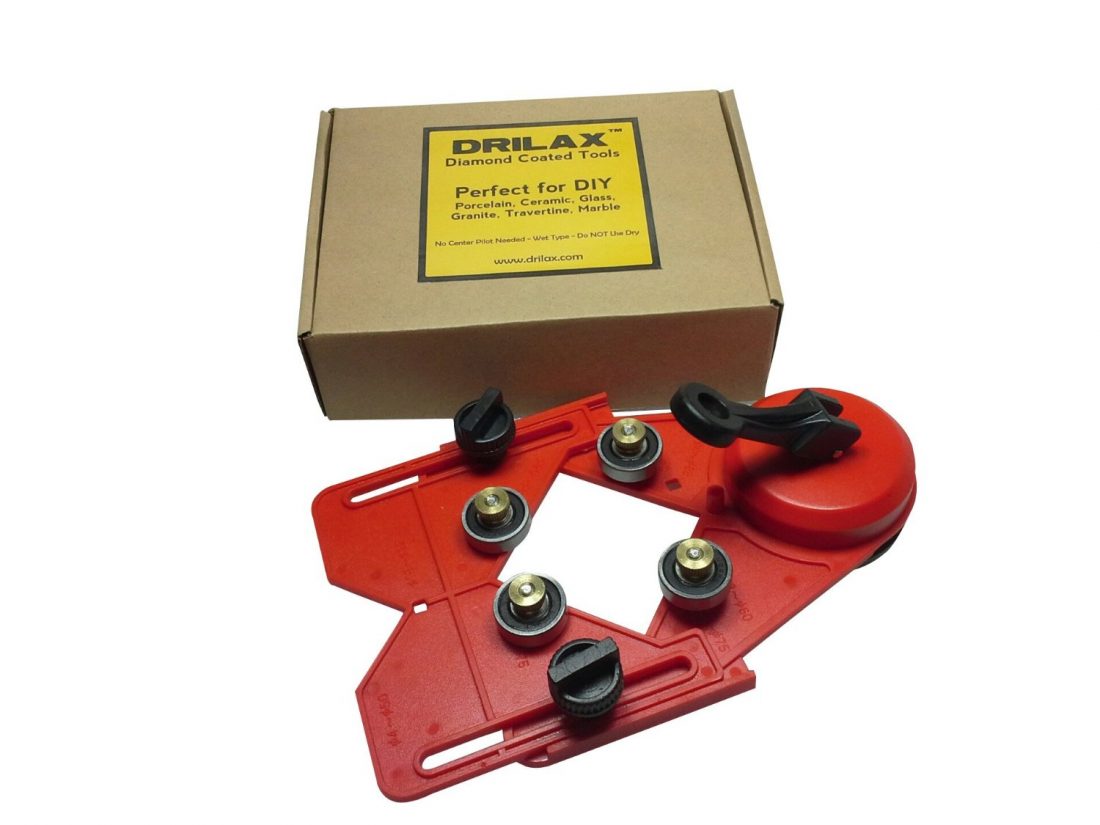
- Durable Plastic Diamond Hole Saw Guide Jig Fixture with Suction Base – Integrated Water Hole
- Adjustable Plate to Guide All Sizes of Hole Saws up to 3 1/4″ Drill Diameters – Flip the plate
- 1 Side of the Plate for Drills up to 3 inches, and Flip the Plate for Larger Sizes up to 3 1/4″
- Use the Guide to Start the Hole – Remove the Guide for the Remainder of the Hole
- Secure The Guide with Suction Base – Feed Water through the Integrated Hole
High-Quality Plastic Diamond Hole Saw Drill Guide with Suction Cup Base
Product Base Dimension: 6″ x 8″
Maximum Hole Saw Dimension: 3 1/4″
Plate Face A: Holes up to 3 inches
Plate Face B: Holes up to 3 1/4 inches
Flip the plate to switch from Side A to Side B
For smaller sizes, you can remove the ball bearings.
Diamond Hole Saw Guide – Perfect Hole Starter for Ceramic, Glass, Granite, Porcelain or any smooth surface where the suction cup base can hold on to – Including Walls

How to use the hole saw jig:
1. Adjust the sliding plate for the size of the hole saw – drill bit you want to use. One side of the plate is for sizes up to 3 inches and flip the plate for larger sizes up to 3 1/4″
2. Fix the guide using the suction base exactly where you want to drill the hole. Check the drill guide location and slider position before you start drilling. Measure – check twice and drill once.
3. Using water as a coolant, start the hole. You can spray the water or use the integrated hole.
4. Use the guide until the drill bit – hole saw makes an initial mark deep enough to keep the bit in position. You can remove the guide and continue drilling in the same spot.
5. While drilling, keep using water to cool down the diamond drill bit – hole saw. Spray bottles, running water, or a small water pool around the hole can be used to cool the tool.
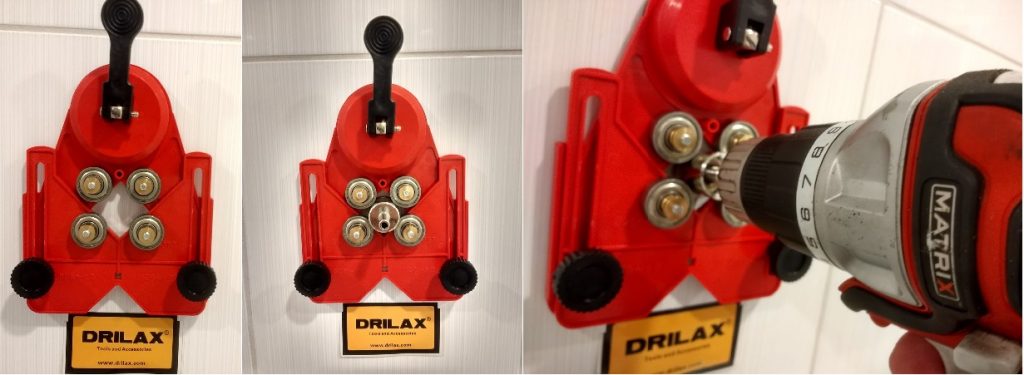
The suction cup of this hole saw jig is strong enough to hold the guide and the drill bit on the wall – vertical orientation:
Here is a video made by one of our previous customers:

